1、首先,创建一个Maven工程

2、填写坐标信息

3、然后创建两个module,分别作为web程序入口和配置swagger的模块。

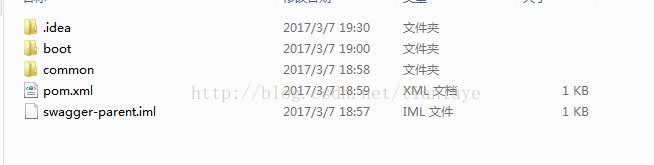
4、这时候,就可以删除根目录下的src文件夹,最后工程结构为(boot和common是两个字模块):
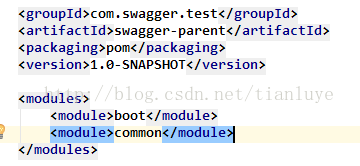
5、现在父pom文件里已经指定了这两个子模块,子模块中也指定了父pom:

6、既然boot是作为程序入口,所以它的打包方式为war即可。

7、父子pom的层级关系已经确定下来,下面就是要指定具体的依赖。因为swagger是基于restful风格的api管理工具,所以项目要是springmvc架构的。
增加springmvc的依赖和对swagger的依赖:
父pom文件:
<?xml version="1.0" encoding="UTF-8"?>
<project xmlns="http://maven.apache.org/POM/4.0.0"
xmlns:xsi="http://www.w3.org/2001/XMLSchema-instance"
xsi:schemaLocation="http://maven.apache.org/POM/4.0.0 http://maven.apache.org/xsd/maven-4.0.0.xsd">
<modelVersion>4.0.0</modelVersion>
<groupId>com.test.swagger</groupId>
<artifactId>swagger-parent</artifactId>
<packaging>pom</packaging>
<version>1.0-SNAPSHOT</version>
<modules>
<module>boot</module>
<module>common</module>
</modules>
<dependencyManagement>
<dependencies>
<!--java ee-->
<dependency>
<groupId>javax</groupId>
<artifactId>javaee-api</artifactId>
<version>7.0</version>
</dependency>
<dependency>
<groupId>javax.servlet</groupId>
<artifactId>javax.servlet-api</artifactId>
<version>3.1.0</version>
</dependency>
<!--spring-->
<dependency>
<groupId>org.springframework</groupId>
<artifactId>spring-webmvc</artifactId>
<version>4.3.6.RELEASE</version>
</dependency>
<dependency>
<groupId>org.springframework</groupId>
<artifactId>spring-orm</artifactId>
<version>4.3.6.RELEASE</version>
</dependency>
<!--swagger-->
<dependency>
<groupId>io.springfox</groupId>
<artifactId>springfox-swagger2</artifactId>
<version>2.6.1</version>
</dependency>
<dependency>
<groupId>io.springfox</groupId>
<artifactId>springfox-swagger-ui</artifactId>
<version>2.6.1</version>
</dependency>
<dependency>
<groupId>io.springfox</groupId>
<artifactId>springfox-staticdocs</artifactId>
<version>2.6.1</version>
</dependency>
<!--json-->
<dependency>
<groupId>com.fasterxml.jackson.core</groupId>
<artifactId>jackson-databind</artifactId>
<version>2.8.5</version>
</dependency>
</dependencies>
</dependencyManagement>
</project>
8、boot子模块的pom文件:
<?xml version="1.0" encoding="UTF-8"?>
<project xmlns="http://maven.apache.org/POM/4.0.0"
xmlns:xsi="http://www.w3.org/2001/XMLSchema-instance"
xsi:schemaLocation="http://maven.apache.org/POM/4.0.0 http://maven.apache.org/xsd/maven-4.0.0.xsd">
<parent>
<artifactId>swagger-parent</artifactId>
<groupId>com.test.swagger</groupId>
<version>1.0-SNAPSHOT</version>
</parent>
<modelVersion>4.0.0</modelVersion>
<packaging>war</packaging>
<artifactId>boot</artifactId>
<dependencies>
<!--spring-->
<dependency>
<groupId>org.springframework</groupId>
<artifactId>spring-webmvc</artifactId>
</dependency>
<dependency>
<groupId>org.springframework</groupId>
<artifactId>spring-orm</artifactId>
</dependency>
<!--jackson-->
<dependency>
<groupId>com.fasterxml.jackson.core</groupId>
<artifactId>jackson-databind</artifactId>
</dependency>
<!--swagger-->
<dependency>
<groupId>io.springfox</groupId>
<artifactId>springfox-swagger2</artifactId>
</dependency>
<dependency>
<groupId>io.springfox</groupId>
<artifactId>springfox-swagger-ui</artifactId>
</dependency>
<!--java ee-->
<dependency>
<groupId>javax</groupId>
<artifactId>javaee-api</artifactId>
<scope>provided</scope>
</dependency>
<!--common-->
<dependency>
<groupId>${project.parent.groupId}</groupId>
<artifactId>common</artifactId>
<version>${project.parent.version}</version>
</dependency>
<dependency>
<groupId>javax.servlet</groupId>
<artifactId>javax.servlet-api</artifactId>
<scope>test</scope>
</dependency>
<dependency>
<groupId>io.springfox</groupId>
<artifactId>springfox-staticdocs</artifactId>
<scope>test</scope>
</dependency>
</dependencies>
</project>
9、common子模块的pom文件:
<?xml version="1.0" encoding="UTF-8"?>
<project xmlns="http://maven.apache.org/POM/4.0.0"
xmlns:xsi="http://www.w3.org/2001/XMLSchema-instance"
xsi:schemaLocation="http://maven.apache.org/POM/4.0.0 http://maven.apache.org/xsd/maven-4.0.0.xsd">
<parent>
<artifactId>swagger-parent</artifactId>
<groupId>com.test.swagger</groupId>
<version>1.0-SNAPSHOT</version>
</parent>
<modelVersion>4.0.0</modelVersion>
<artifactId>common</artifactId>
<dependencies>
<!--spring-->
<dependency>
<groupId>org.springframework</groupId>
<artifactId>spring-webmvc</artifactId>
<optional>true</optional>
</dependency>
<dependency>
<groupId>org.springframework</groupId>
<artifactId>spring-orm</artifactId>
<optional>true</optional>
</dependency>
<!--swagger-->
<dependency>
<groupId>io.springfox</groupId>
<artifactId>springfox-swagger2</artifactId>
<optional>true</optional>
</dependency>
<dependency>
<groupId>io.springfox</groupId>
<artifactId>springfox-staticdocs</artifactId>
<version>2.6.1</version>
<optional>true</optional>
</dependency>
<!--jackson-->
<dependency>
<groupId>com.fasterxml.jackson.core</groupId>
<artifactId>jackson-databind</artifactId>
<optional>true</optional>
</dependency>
<!--java ee-->
<dependency>
<groupId>javax</groupId>
<artifactId>javaee-api</artifactId>
<optional>true</optional>
</dependency>
</dependencies>
</project>
10、boot作为web程序入口,其WEB_INF/web.xml文件定义如下:
<?xml version="1.0" encoding="UTF-8"?>
<web-app xmlns="http://java.sun.com/xml/ns/javaee"
xmlns:xsi="http://www.w3.org/2001/XMLSchema-instance"
xsi:schemaLocation="http://java.sun.com/xml/ns/javaee
http://java.sun.com/xml/ns/javaee/web-app_3_0.xsd"
version="3.0">
<!--Encoding Filter-->
<filter>
<filter-name>encodingFilter</filter-name>
<filter-class>org.springframework.web.filter.CharacterEncodingFilter</filter-class>
<init-param>
<param-name>encoding</param-name>
<param-value>UTF-8</param-value>
</init-param>
</filter>
<filter-mapping>
<filter-name>encodingFilter</filter-name>
<url-pattern>/*</url-pattern>
</filter-mapping>
<!--Spring MVC-->
<servlet>
<servlet-name>springmvc</servlet-name>
<servlet-class>org.springframework.web.servlet.DispatcherServlet</servlet-class>
<init-param>
<param-name>contextConfigLocation</param-name>
<param-value>classpath:context-mvc.xml</param-value>
</init-param>
<load-on-startup>1</load-on-startup>
</servlet>
<servlet-mapping>
<servlet-name>springmvc</servlet-name>
<url-pattern>/</url-pattern>
</servlet-mapping>
</web-app>
11、其中,web.xml文件指定了springMvc的配置文件为:类路径下的context-mvc.xml。
context-mvc.xml配置为:
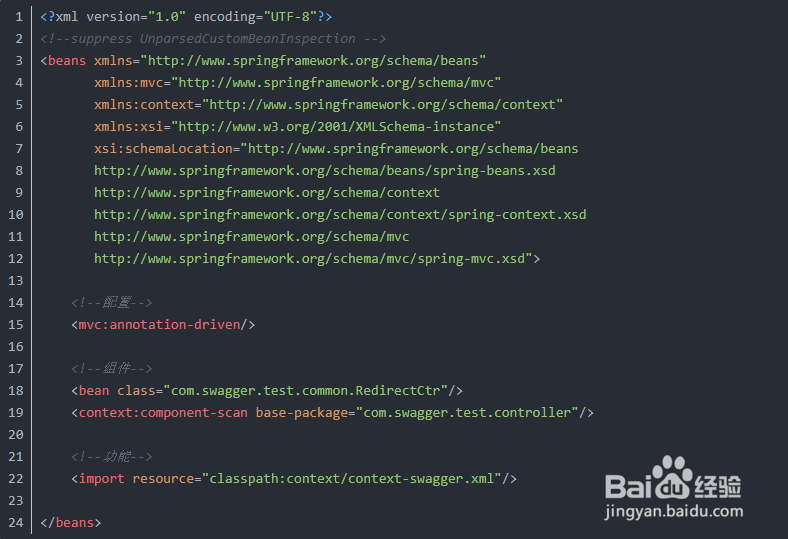
12、其中第一条是指开启注解功能,第二条注册了一个bean实例,用来指定容器初始化后重定向的页面信息;第三条声明了一个类路径下的扫描器;第四条用于引入swagger的配置文件context-swagger.xml。
RedirectCtr类如下:
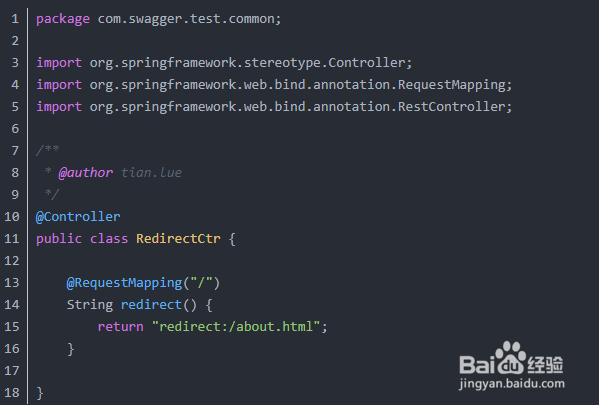
13、它指定了重定向的路径为about.html
context-swagger.xml文件如下:
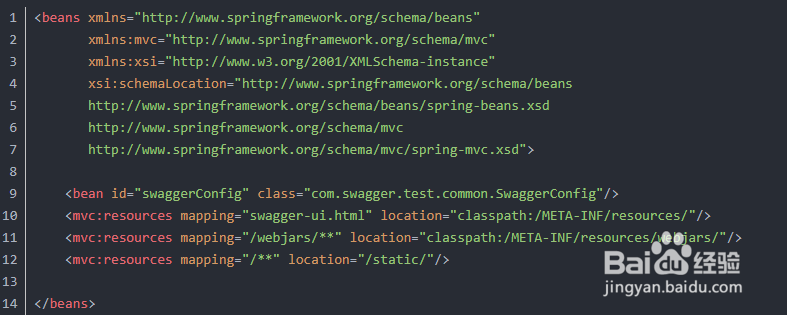
14、首先,它注册了一个bean,用于配置swagger的基本信息,然后指定了swagger的页面(后面几个不能随意改变)。
SwaggerConfig配置类如下:
package com.swagger.test.common;
import com.google.common.base.Predicate;
import org.springframework.context.annotation.Bean;
import springfox.documentation.builders.ApiInfoBuilder;
import springfox.documentation.service.ApiInfo;
import springfox.documentation.spi.DocumentationType;
import springfox.documentation.spring.web.plugins.Docket;
import springfox.documentation.swagger2.annotations.EnableSwagger2;
import static com.google.common.base.Predicates.or;
import static springfox.documentation.builders.PathSelectors.regex;
/**
* @author tian.luye
*/
@EnableSwagger2
public class SwaggerConfig {
@Bean
public Docket selfCareApi() {
return new Docket(DocumentationType.SWAGGER_2)
.groupName("swagger")
.apiInfo(selfCareApiInfo())
.select()
.paths(selfCareApiPaths())
.build();
}
private ApiInfo selfCareApiInfo() {
return new ApiInfoBuilder()
.title("Test Swagger API")
.version("1.0-SNAPSHOT")
.build();
}
private Predicate<String> selfCareApiPaths() {
//noinspection unchecked
return or(
regex("/test.*")
);
}
}
15、这个配置类描述的非常清楚,只配置了两处信息:一是Swagger的基本描述信息,二是Swagger的拦截路径,即加在类上的RequestMapping的path值。
最后,我们需要编写Controller接口代码
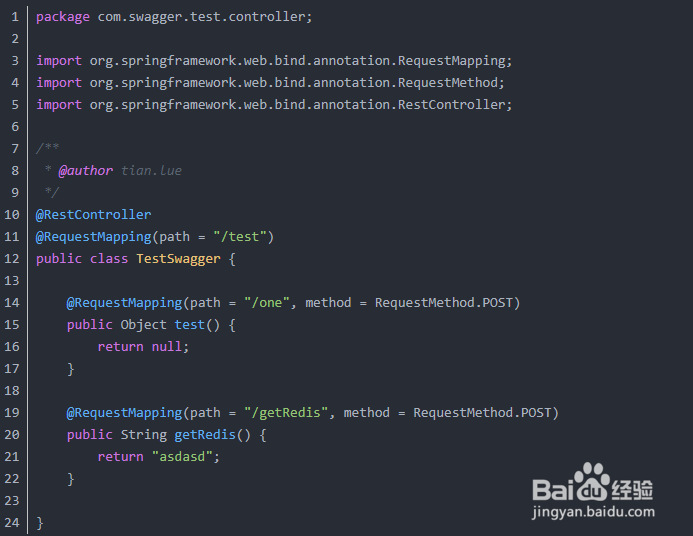
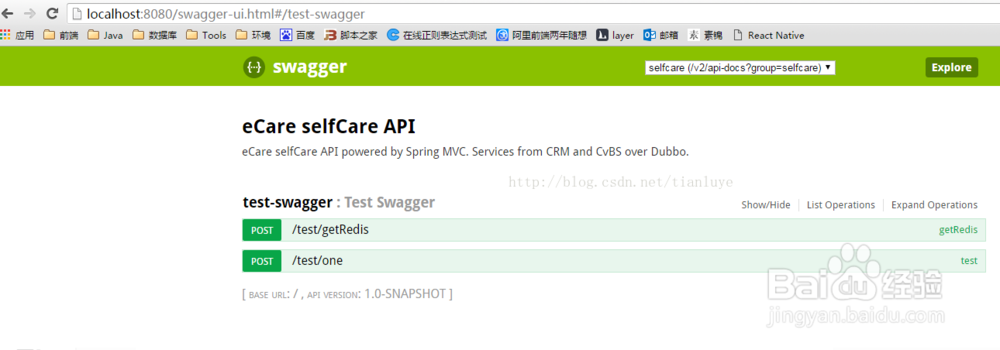
16、运行后可以通过about.html中的超链接访问到配置好的Swagger页面中: